The Backstory
I've been tinkering with this neat little mini PC powered by the ADL-N N150 chip. I'm a big fan of these tiny powerhouses - they're like Raspberry Pis on steroids, but way more efficient. To give you an idea, this little beast sips just 6 watts at idle while running all my critical services. Pretty impressive, right?
But here's where things got interesting. The system in question, supposedly supports both NVMe and SATA drives in its M.2 slot. However, when I swapped in an NVMe drive, Proxmox (and literally every other operating system I tried, including Windows) threw a tantrum. Proxmox flat-out refused to see any drives, claiming "No Supported Hard Disks Found." After some back-and-forth with the manufacturer, they sent me a BIOS update that would supposedly fix everything.
Here's the catch - they insisted the update had to be done through Windows. Slight problem: I'd already wiped Windows and replaced it with Proxmox. Oops! But don't worry - there's actually a really reliable way to update your BIOS without Windows, and I'm going to walk you through it.
The Solution: EFI Shell to the Rescue
While there are various ways to update BIOS in Linux, including some precompiled binaries, I wanted to play it safe. Nobody wants to brick their motherboard because they skimmed over some crucial fine print! After doing some research on AMI's website, I found they offer two official update methods: Windows (which was out) and EFI shell. Let's go with Door Number Two!
A granular view of the process can be broken down into these sections:
- Prepare a flash drive
- Download the tools from AMI and put it in the right place
- Put the BIOS file inside the flash drive
- Boot into EFI Shell and execute the update
Step 1: Preparing Your Flash Drive (The Foundation)
First things first - we need a properly formatted flash drive. Specifically, we need:
- The first partition in FAT/FAT32 format
- MBR (Master Boot Record) formatting
- A second partition (optional, but helpful for organization)
I'll show you how to do this in MacOS, but Linux users can follow similar steps with their preferred tools.
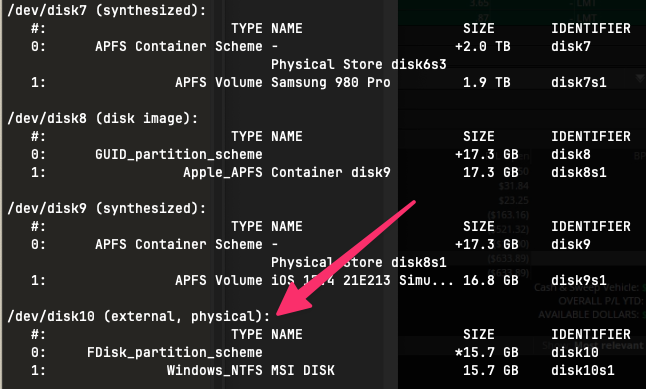
Let's start by finding our flash drive. In MacOS, run:
diskutil list
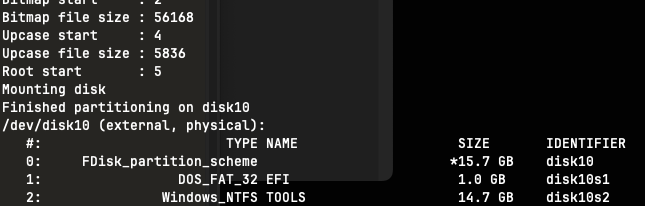
Look for your flash drive in the output - in my case, it was disk10. Double-check this carefully - we don't want to accidentally format the wrong drive!
Now for the fun part. We'll use this command to set up our drive:
diskutil partitionDisk disk10 MBR MS-DOS EFI 1G ExFat TOOLS R
Let's break down what this command does:
disk10: Your flash drive (remember, yours might be different!)MBR: Sets up Master Boot Record formattingMS-DOS: Creates the first partition as FAT32EFI: Names the first partition "EFI"1G: Gives it 1GB of spaceExFat TOOLS R: Creates a second partition named "TOOLS" with the remaining space
Don't worry if you see "Windows_NTFS" in the partition type - it's actually ExFAT and will work just fine.
Step 2: Gathering the Tools (The Fun Part)
Now we need two things:
- AMI's BIOS update utility
- EFI shell boot files
First, head to AMI's website and download the "APTIO V AMI FIRMWARE UPDATE UTILITY". It's like a Russian nesting doll of zip files:
- Open the main zip file
- Navigate to
/afu/afuefi/64 - Find and open
AfuEfi64.zip - Extract
AfuEfix64.efi
Copy this file to your flash drive's EFI partition. Think of it as your BIOS-updating Swiss Army knife.
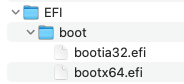
Next, you'll need the EFI shell boot files. These should come with your manufacturer's BIOS package in an EFI folder. Copy the entire folder to your flash drive's EFI partition. When you're done, you should have this structure:
Step 3: The BIOS File (The Final Piece)
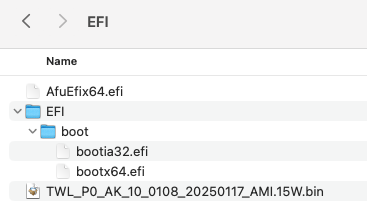
Copy your new BIOS file (usually ending in .bin or .cap) to the flash drive. Now your drive should have everything needed for the update! Here’s what my flash drive looks like after I prepared all the necessary files:
Step 4: The Moment of Truth (Updating the BIOS)
Here's where it gets exciting! Boot up your computer with the flash drive inserted, and interrupt the boot process to select USB boot. You should see the EFI shell appear.
When prompted to interrupt the startup script, do it! You'll end up at a command line that looks like this:
SHELL\>
Look for volume mappings in the startup text (use PgUp and PgDn to scroll). Your flash drive will be labeled something like FS0 or FS1. To select it, type:
SHELL\> FS1: ##don't forget the colon at the end
Now the shell will be:
fs1:\>
You can also use ls to list all directories and files, which I am not going to do here. With the volume selected, we will use the following command to flash the BIOS. You can read the readme.txt file inside the zip file to see what these flags do.
fs1:\> AfuEfix64.efi {YOUR_BIOS_FILE_NAME.bin} /p /b /n /x
The BIOS update should begin immediately. The process will be shown on screen. This is what it looks like when it’s done:
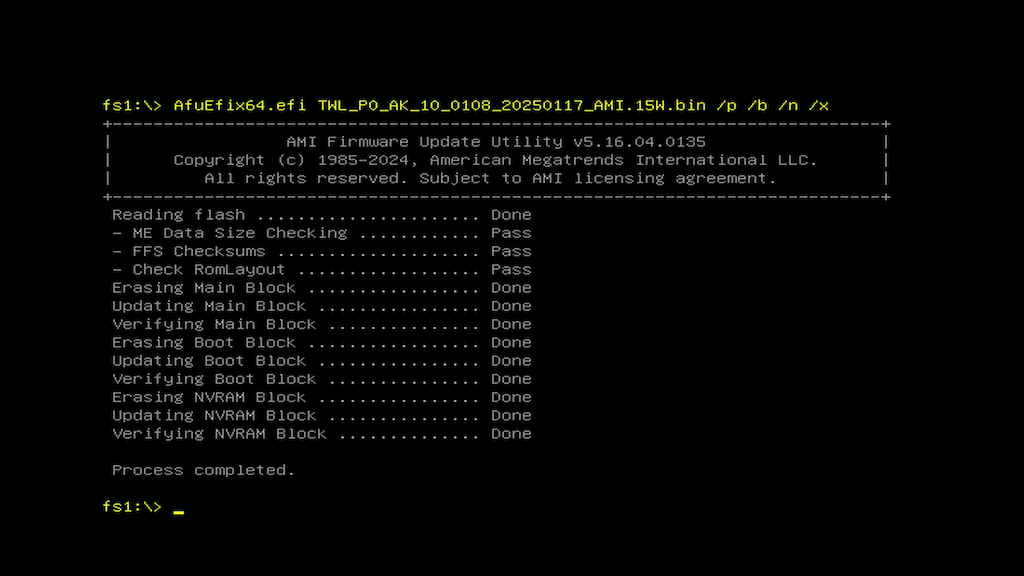
Don't panic if you see a few reboots and black screens - that's totally normal during the first boot after a BIOS update.
And there you have it! You've successfully updated your BIOS without Windows. Not so scary after all, right? Let me know if you'd like me to clarify anything further or if you run into any snags along the way!
Final Words
Updating your BIOS through EFI shell might seem daunting at first, but it's actually quite straightforward once you break it down into steps. While this method saved me from having to reinstall Windows just for a BIOS update, it's also generally more reliable than some of the other alternatives floating around the internet.
A few parting tips:
Always double-check your BIOS file is the correct one for your motherboard
Make sure your computer won't lose power during the update (if you're using a laptop, keep it plugged in!)
Don't panic if the first boot after the update takes longer than usual - this is perfectly normal
Keep your flash drive with the EFI shell handy - it can be useful for other BIOS-related tasks too
And yes, in case you're wondering - after the BIOS update, my NVMe drive worked perfectly! Sometimes the simplest solution really is the best one, even if it means spending a few extra minutes setting up a proper EFI environment.
Happy BIOS updating! 🖥️